1. Select the Right Photo
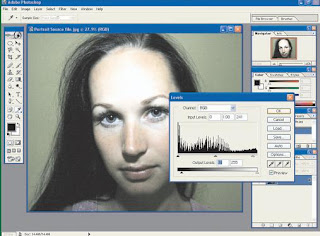
First, select a close-up images that fit this effect to be given. Photo close-up of simple, lighting fitting, and the background objects do not disrupt the main image is the right to be given this effect. Does not need a photo studio to get the images that fit. Once available, lighting to play with the image parameters Level. How, click the Image menu | adjustments | Levels ... After histogram appear, you can modification friction with the slide-tab is necessary. After getting a fitting, then click OK your photos is now more Contrast.
2. face with Cropping
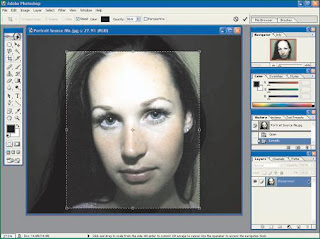
Images obtained after the fit and better lighting and color, the next step is to make this picture has a prominent main object. In case this is the face of the model must be truly dominant. How to create a dominant is to all edge-edge of the object. To do this you can use the Crop tool facilities. How,
3. Remove Tint Photos
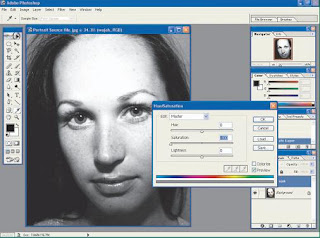
Now your photos are ready to be more classic effect. The next step is to eliminate the color looks so classic. But before duplikasilah this first photo. How, click the menu Layer | Duplicate Layer ... After the menu appears, give it the name "Body" in this layer and then click OK so the new layer. When done, Click the layer face and removed the color by clicking on the Image menu | adjustments | Hue / saturation. Eliminate color saturation with the tab to move towards the left corner with the contents or value of -100. After you finish the picture does not become colored.
4. Increase Contrast
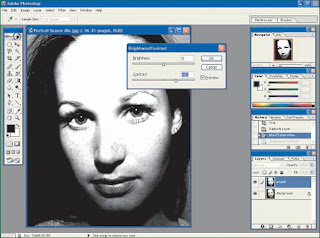
Once the color is missing, the next step is menaikan contrast of your images is. Which is a high contrast characteristics of the classic images of many outstanding year 60-an. To menaikan Contrast, you can do so by clicking the menu Image | adjustments | Brightness / Contrast ... Then slide the tab parameter Contrast to the image appear brighter. Slide the tab to fit with your taste. Then click OK and your photo is now more contrast.
5. Lighting Like Studio
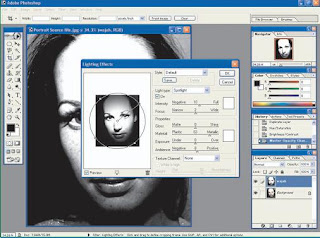
To add a classic feel, you can be a little "trick" to create effects such as pen-cahayaan system in the studio complex. You can make it very easy with the effect of rendering assistance. How pembuatannya, Click menu Filter | Render | Lightning ... After Effects menu appears, Set the direction and type of lighting where you like. Should give additional light around the eyes to appear more prominent. In testing this type of lighting we use Spotlight. When done set the direction and the strong light, then click OK you will get light on the artificial images.
6. Soften Photo with blur
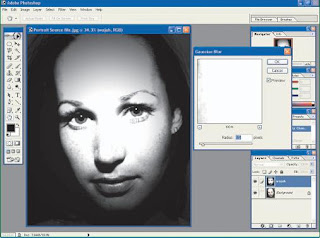
After the images have made in lighting, are actually very classic look. The next step is to soften this image to appear more comfortable viewing. To do this is to give effect blur. Click the menu Filter | blur | Gaussian blur ... then fill in the value of its radius to be equal to 1.5 pixels. Then click OK, then your picture will appear softer. Send down the layer opacity face value of 100% to about 85% only. Thus, your images appear slightly soft because of the effect on the contrast enhancement to create a sharp gradation between light and dark areas.
7. Classic Photo Finish
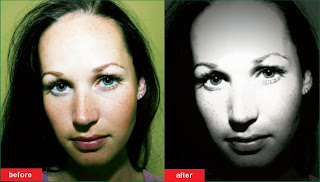
After all steps finished, now you change your image become more classical nuansanya from before. Makes it classic is not only done with the color alone, the addition of lighting effects are also important here. Creativity is required when you set the lighting effect here. You can create a collection of all your photos into a photo studio other nuances classical steps with this easy.
No comments:
Post a Comment