1. Open Photos Target
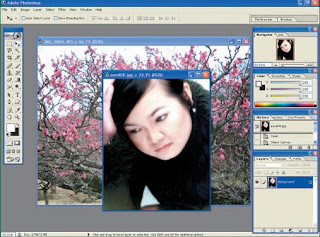
The first step is to open all the photos you want to combine into a canvas. Open up all the photos that you become a target fusion. Click the File menu do | Open. In the browser window is choose an image that you want to open, after a match click the Open button. Repeat steps to open this picture on all the images into your target. Once completed, all images should be in the top of the page of Adobe Photoshop and mutual slump
2. Create a new canvas
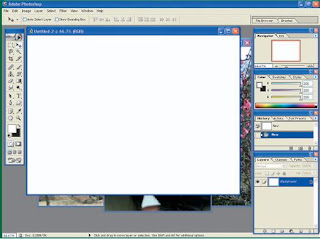
After all the image open, create a new canvas the size as you need. How to make it, Click the menu File | New. Then after setting the window appears, fill in the canvas size you want along with the resolution (easier to use parameters pixels). After that, fill the fields with the parameters mode and select RGB Color option White in the Contents. After all matches, click the OK button then a new white canvas direct form.
3. Satukan and Organize Photos

The next step is to unify all the photos in this canvas before. Click one of how your images, and then press CTRL + A. After selection entire image area, press the CTRL + C. Then click the new canvas and press the CTRL + V, then one of your photos are already on the canvas into a new layer. Set the layout and size according to your needs. Repeat this step until all the photos on all new canvas was in order and organized lying.
4. Create a Layer Mask
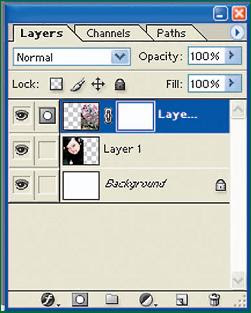
After all finished, you will get two new layer on your new canvas. Second layer contains the respective images to be combined. The next step is to create a layer mask on one layer image. To make this, start by clicking on the layer you want to be the layer mask. After that, Click on the icon that is next to the bottom of the Layers tab. Once clicked, a page layer and the mask will be visible in your layer thumbnail.
5. Give Gradient Effect
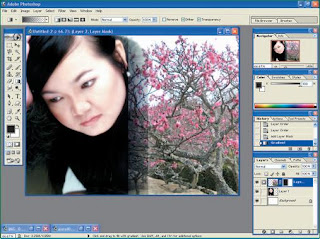
Then give effect gradient layer mask on the page. The goal is to blend the two images you this appears to be soft on the borders of the connection. For that, click the Gradient Tool icon. After that, the dropdown menu Click the Gradient picker at the top of the page work. Then choose the type of foreground to Transparent gradient. When done, change the foreground color and the Background to be the default (black and white). Then give it effect on the gradient layer mask with a click and drag your pointer. Fill in the part where your images on a layer does not cover this area. Once completed, the area will look black on the layer mask.
6. Layer Mask and Gradient More
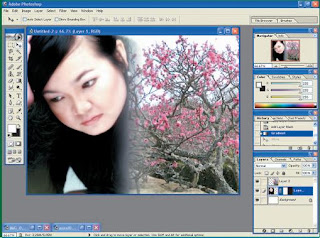
After you have finished giving gradient on an image, again repeat the steps 4 and 5 in the layer of your photos the other. Make a layer mask and repeat the gradient layer on it. Fill in the area of the image is not closed. Once completed, you will also get the layer mask that black part. After giving effect to the second layer mask, layer mask mix with the original layer. Click layer mask of each layer. After the exit menu option, Click Apply Layer Mask option, then the layer mask will be united with the original layer. Make all the layers of your photos.
7. Set Layout
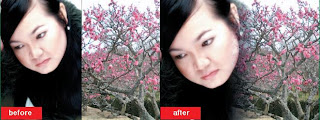
The last step is to set up the layout of the photographs that this limit does not appear to be the connection. Click Move Tool, then click and drag-layer image layer on the page you are on the job until the position is the best. Repeat this on all layers of your photos. Best situation is when the connection does not appear to be images and integrates with the soft. If difficult to find a fitting position, try to switch the position of the second layer image on the Layers tab. Try to exchange photos of an image on the other and vice versa. If you are fit, you have to get a blend of rich meaning of the image.
No comments:
Post a Comment