1. Format
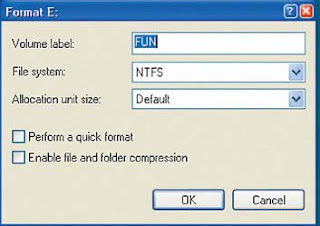
when formatting a hard disk or partition, you can simply right click on the partition and select the desired format. Then specify the type of format the list available in the File system box after that press the OK button, then the format will be run. You can also give a name or label on the new section that will be formatted via the Volume label box that is at the top. How the format you want, just select the option on the OK button.
2. Changing Drive Letter
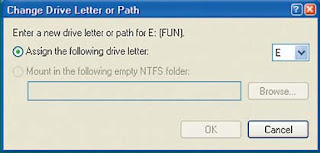
Right-click on the drive letter you want to change and select Change drive letter and path. Then specify the drive letter that will be changed, then press the Change. Then in the following box Assigned drive letter select the desired letter. After that, press the OK button. After you press the OK button, the computer will inform you that the changes can be done to create an application that exists on the drive can not be run again. If you still want to continue, press Yes. Similarly, the second warning. Then restart the computer to activate it. For naming the drive, all can be given a name including the drive C:.
3. Renaming Drive
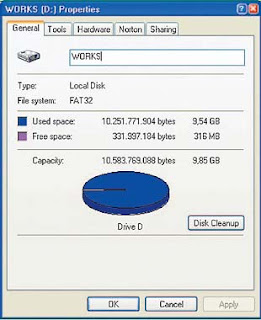
You can also change the naming in line with the drive you want. I select a drive that will be renamed and click on the right and select Properties. At the top of the box enter the desired name and press the OK button or Apply. We suggest naming the label is adjusted to the contents of the hard disk or partition concerned, so that later you will not be difficult to read the contents. Moreover, if the capacity is very large.
4. Defrag
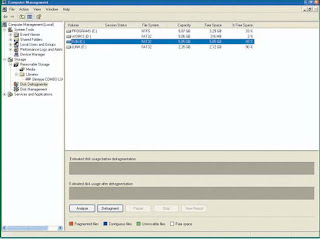
Through computer management page, you can also defrag your hard drive-way open Disk Defragmenter page. Select the drive you want to defrag, and press the button Analize first in the bottom. After that, the Defragment button click to start a defrag-it. Defragment aims to sort out the allocation, or data file on disk. Data that is damaged will be removed so that in addition to alleviate the burden of how hard this can also improve the performance of your hard disk.
5. Error Checking
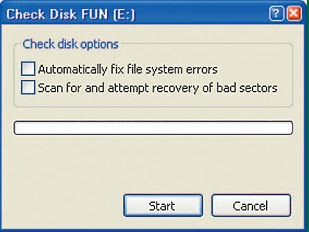
There is damage in your hard drive? Find using the error checking in addition you can find out if there is interference on the hard disk or not. If so, you can directly improve it. How to do error checking is on the right by clicking on the drive and select the desired properties. Tool and not the page, and in the Error Checking click Check Now. After that you will be asked, what if any error will be corrected immediately or not, if I give a check () on boksnya. After that start checking your error by pressing the OK button.
6. Back-up
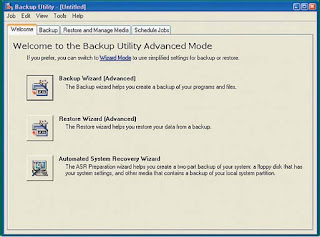
The process of back-up can also be accessed through the computer management or drive properties. I right click on the drive and select properties. Go to the Tools page and press the Back up now. The process of back-up will be like running in general. This will be very easy for you to do the back-up. In addition, you also always reminded every time you check the hard drive capacity. If you are confused how to back-up, try running the application in the wizard.
7. AutoPlay and Burning
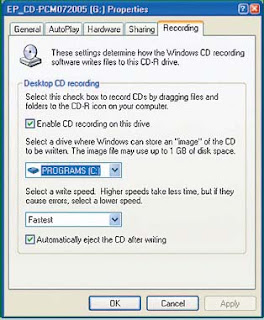
If you have a CD-ROM or CD-RW ROM, then you can set two things. For only the CD-ROM course, you can set the desired process autoplay. While recording in the page, you can set the cache memory where the burning will be placed. And with the speed of the burning process will be done. Our suggestion, give it a value equal to the number of cache CD or DVD you burning normal. For the less cache can make burning process fails or is very slow.
No comments:
Post a Comment